Etsymetal Blog Carnival: Why do you make jewelry?

| |
November brings a new topic for Etsymetal team bloggers: Why do you make jewelry?

Good question. I certainly did not start out my live thinking I would be a metal artist making jewelry. Even 10 years ago that would have been the farthest away from my mind. I never was much into wearing jewelry, still don't. But somehow when I first started working with precious metals something clicked and I found my happy place.

Growing up I always liked design and technical things quite equally. I loved doing things with my own hands. Enjoyed math and physics as much as art classes. So when it came time to choose my calling I thought Architecture would be a good fit. I did love it during college, a bit less once I started working as an architect. I realized over the 15 years working as an architect how frustrating it can be. Lot's of compromises, it's stressful and very challenging. The complexity of it attracted me but it also meant dreams and designs did not usually turn out as expected. I missed being involved in the actual building of the designs beyond just drawing up details and visiting construction sites. Architecture is very complex, involving usually a huge team from designers, managers to engineers and contractors to get one building constructed. There is a lot of separation between design and execution. Somehow in the US the divide is even bigger than in Europe as here legal matters and liability issues are way out of hand. As an architect you just never pick up a tool, you are supposed to leave that to contractors. They usually have the better tool skills than architects but it's still frustrating as I love tools and getting my hands dirty. Plus those multi-million dollar projects I usually worked on took years to get completed. By the time it was done everyone was so frustrated and tired of working together. Usually that does not result in a happy work life.
I always had the dream of having my own firm as I never was quite happy working for others. But the more I leaned about the business side of Architecture I realized that I would not have the financial background to sustain the bad payment practices so common in this field, projects dragging out or being cancelled and all the liability issues involved with construction projects. I was quite happy when I realized I might be able to make a living from my new found hobby designing and making jewelery.

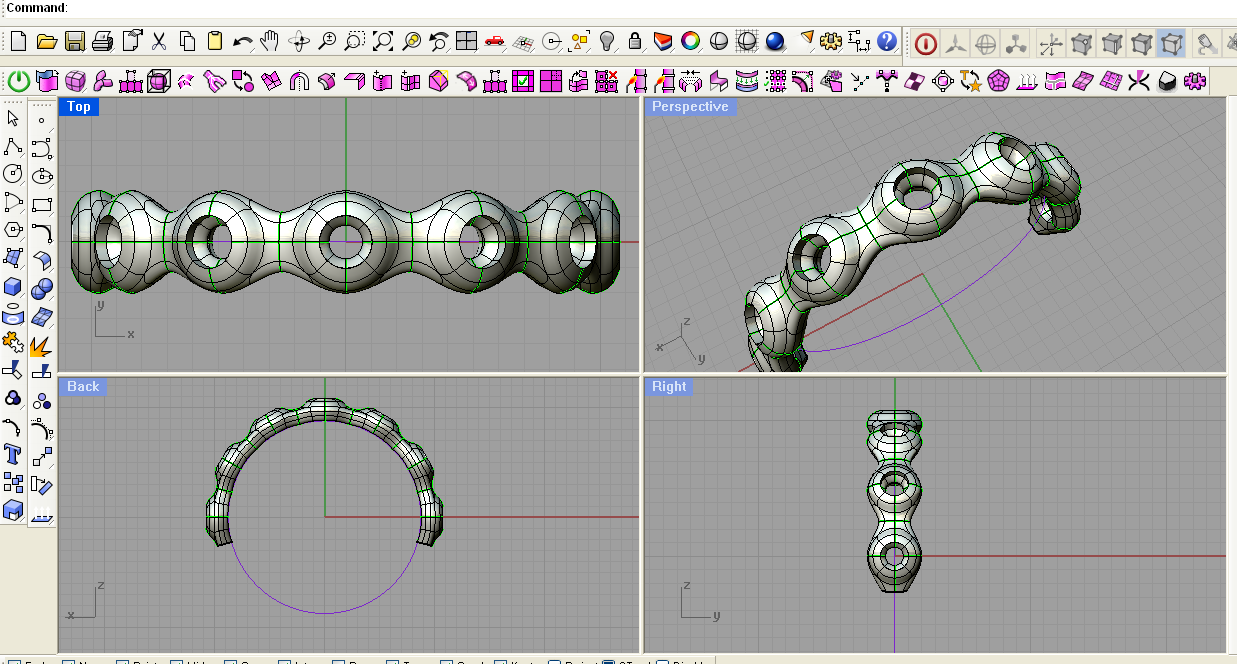
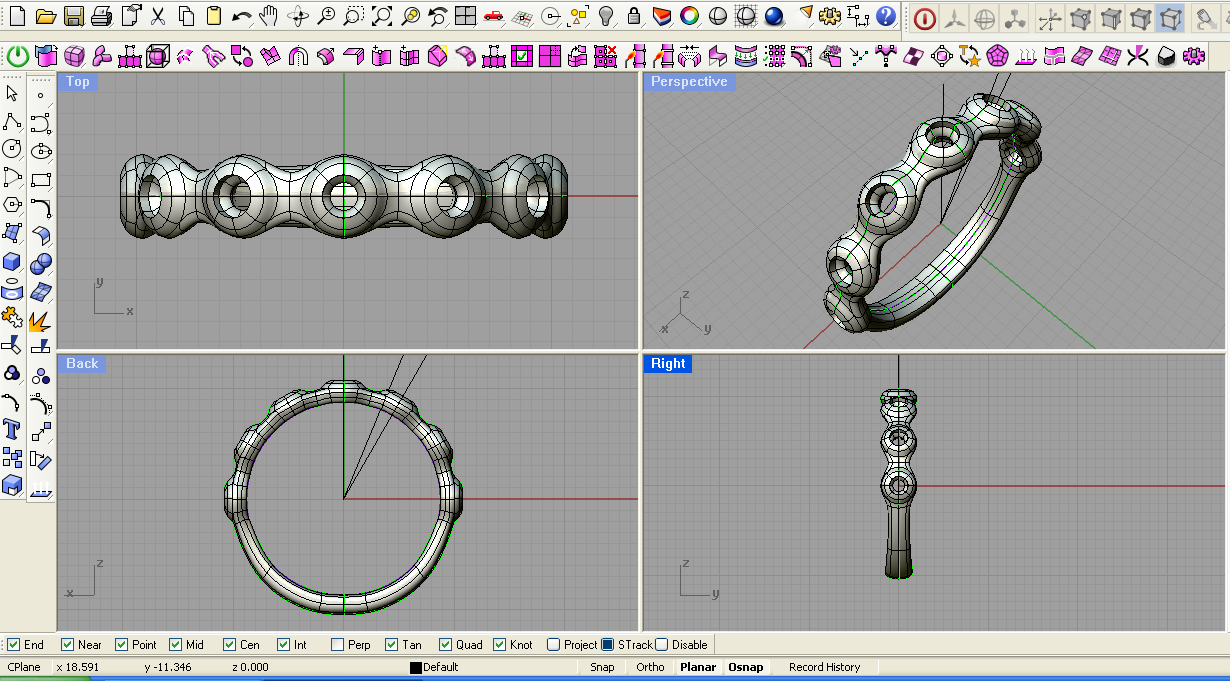
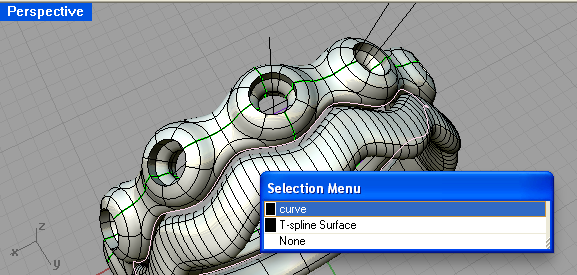
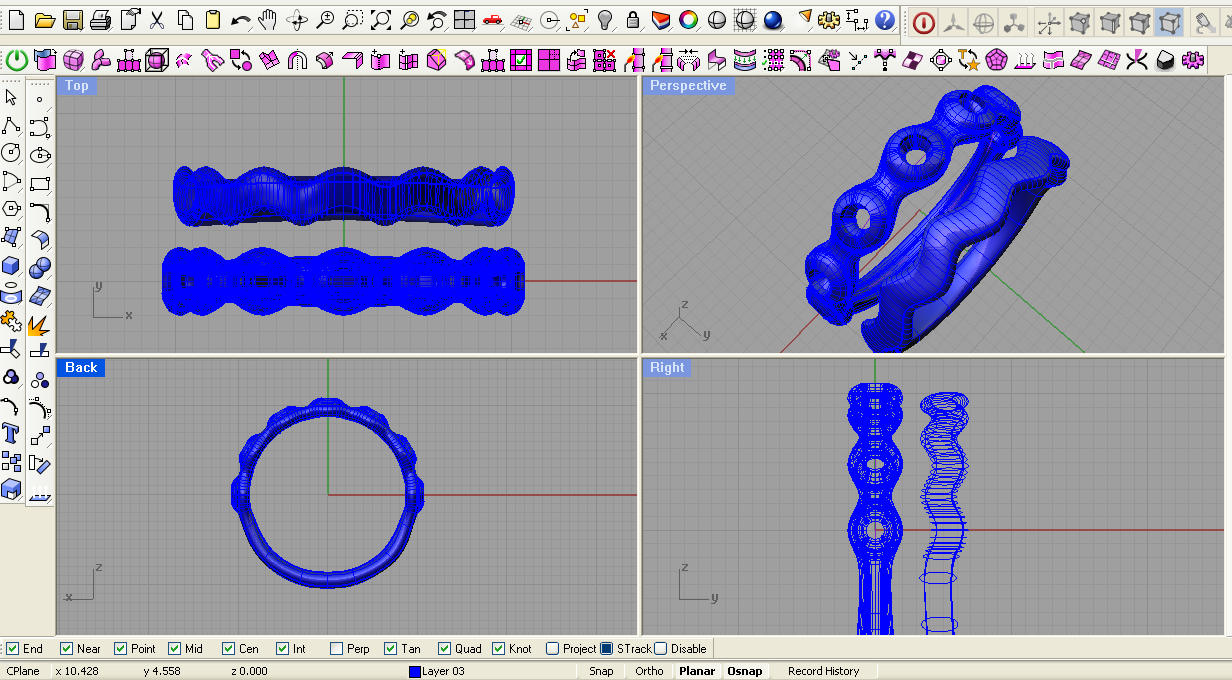
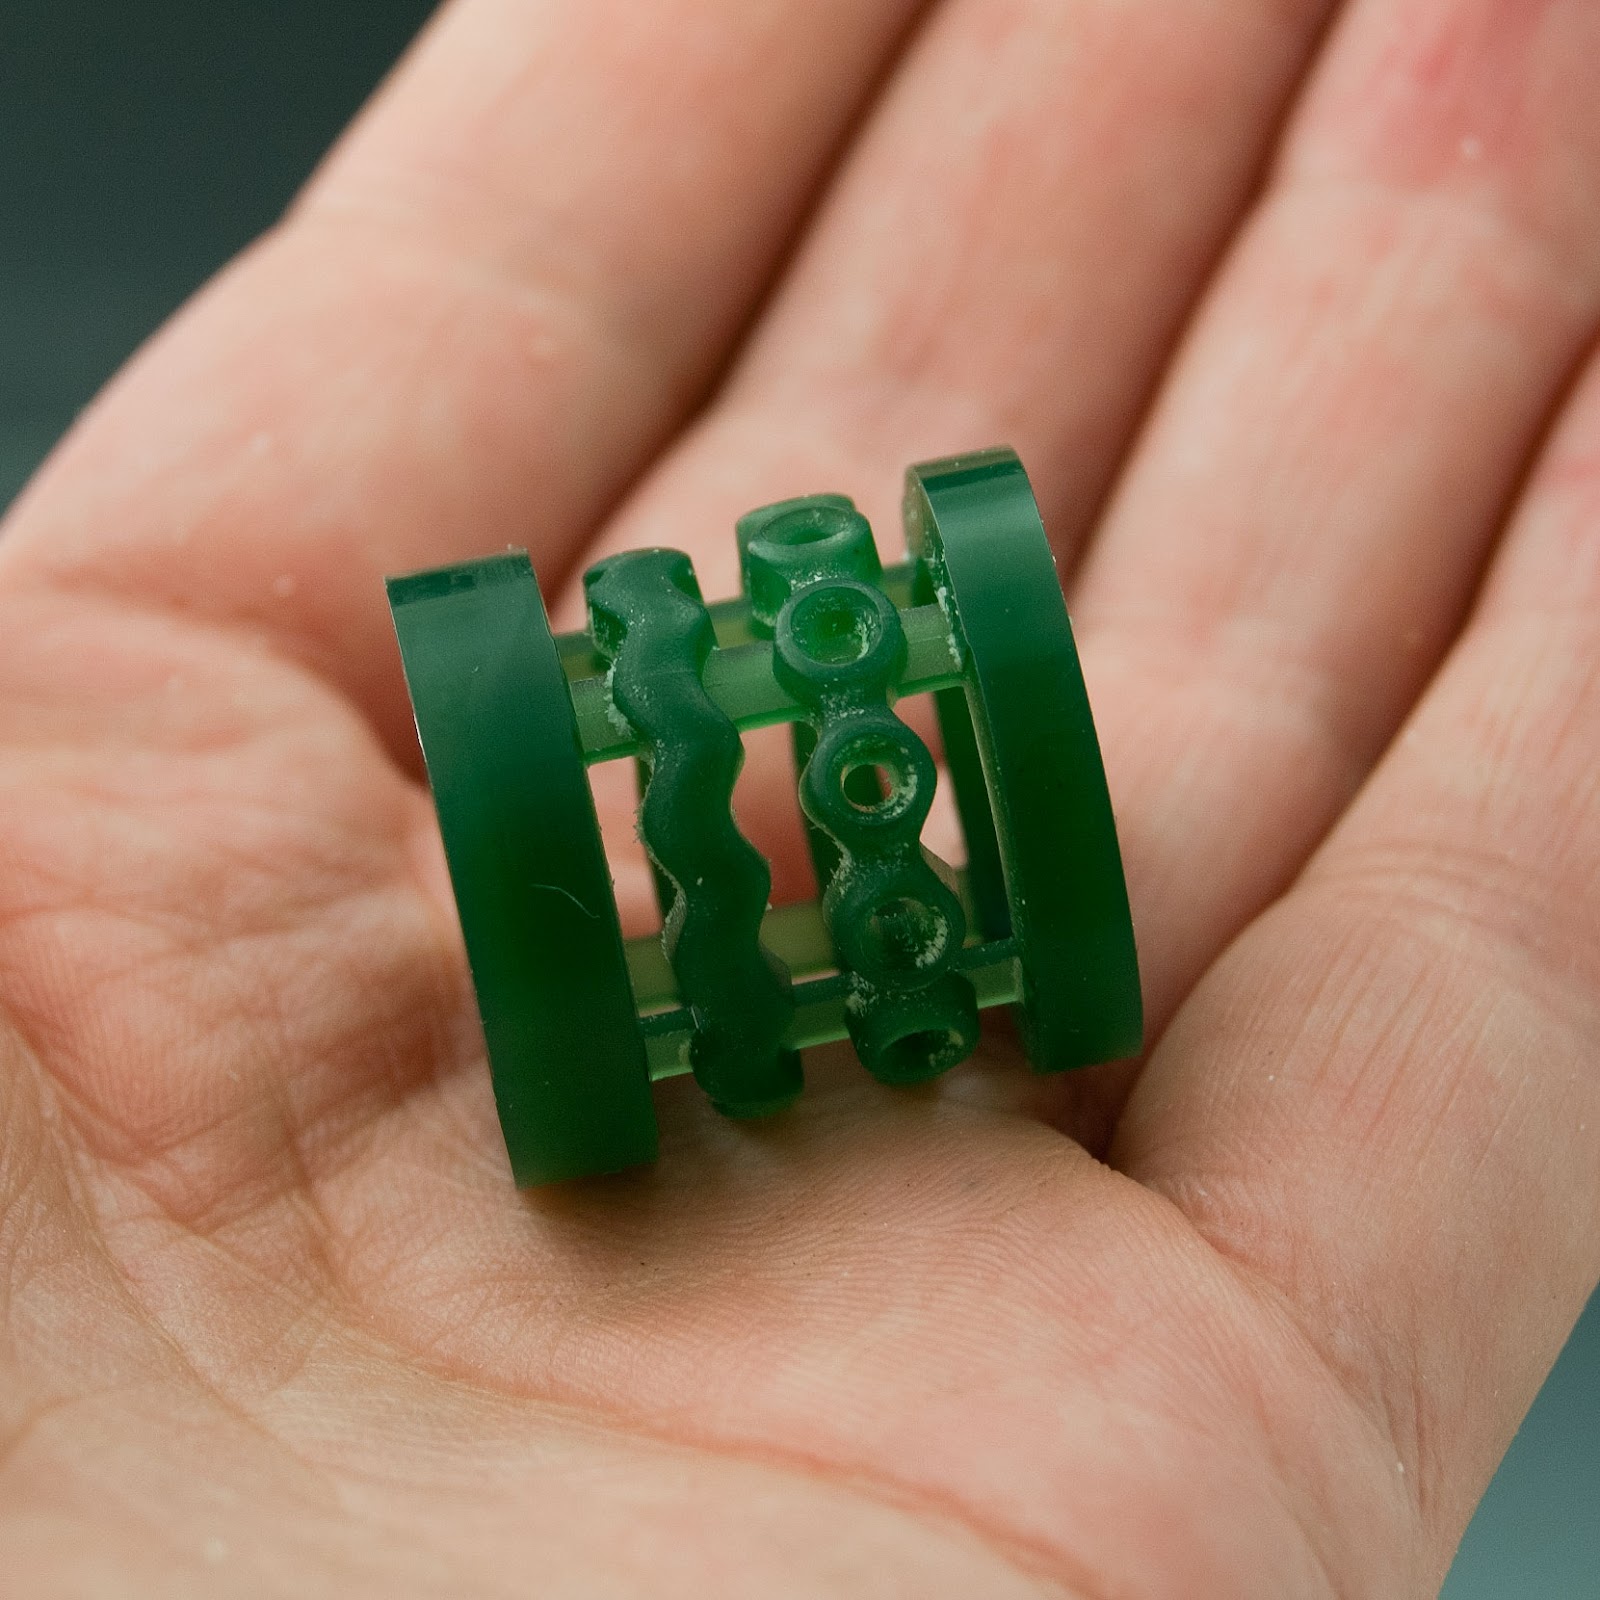
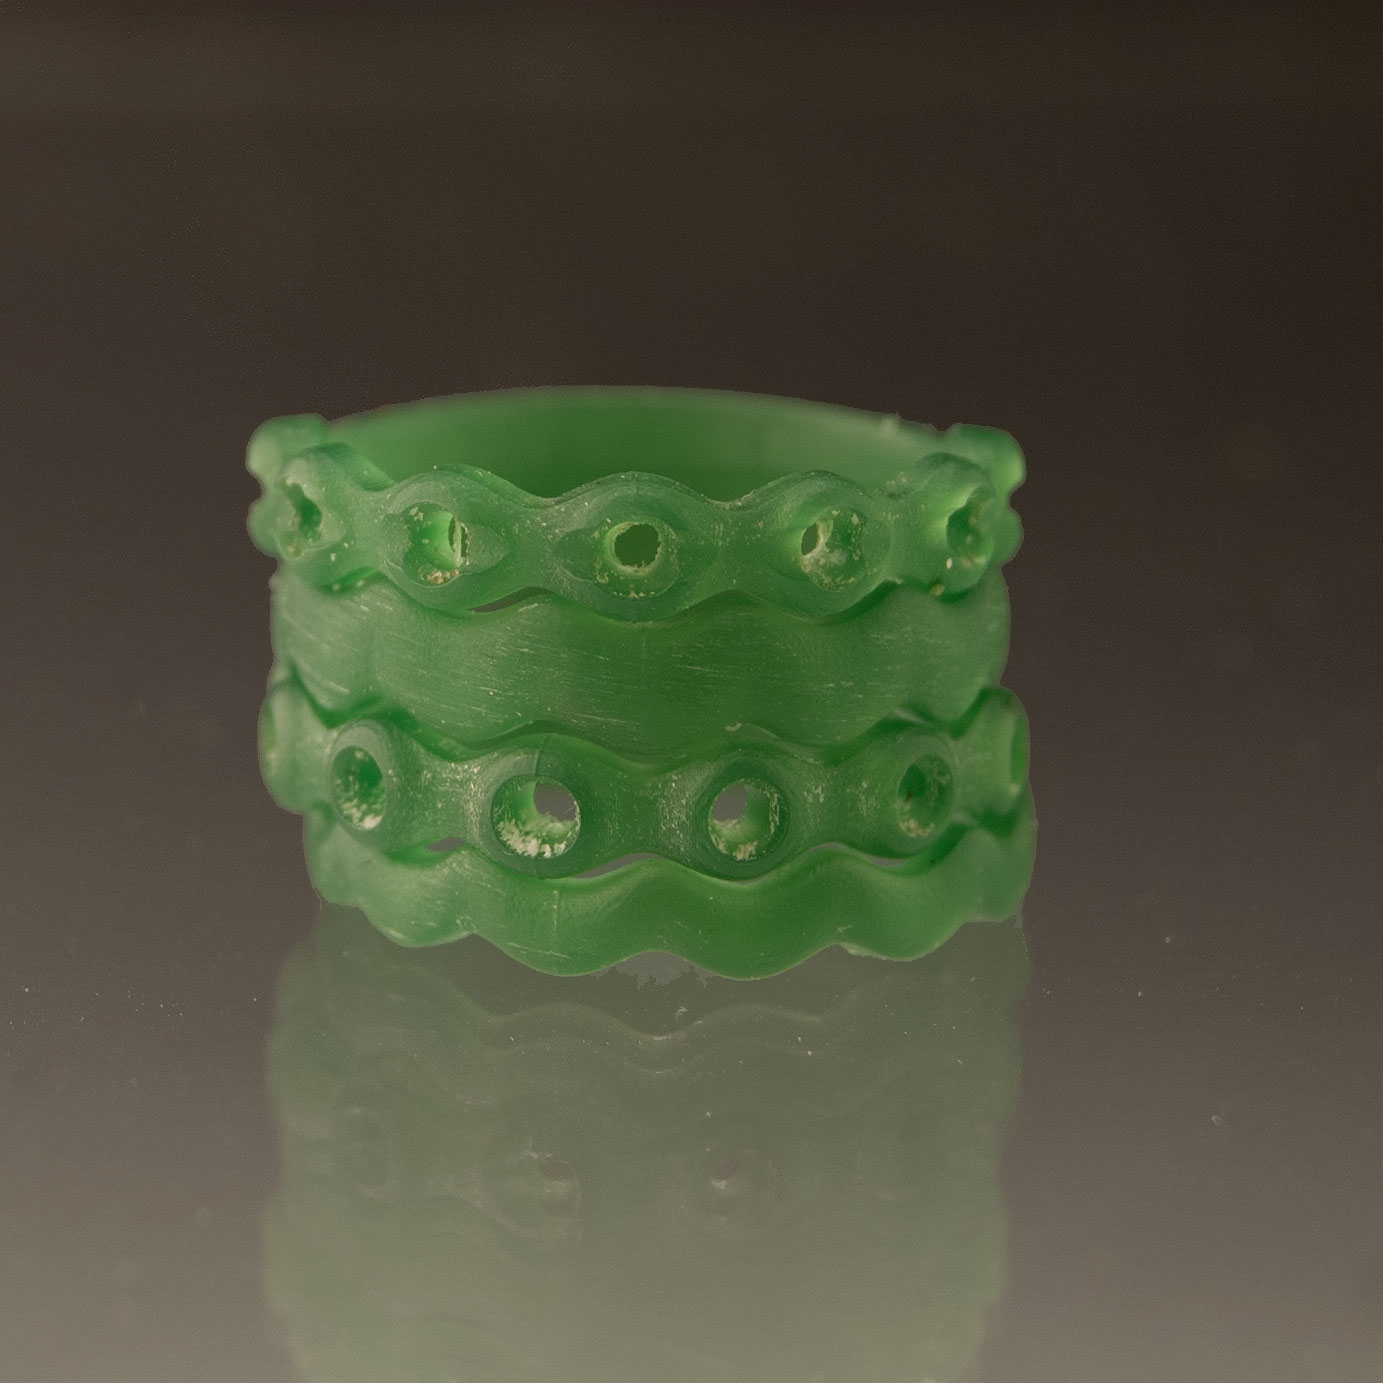
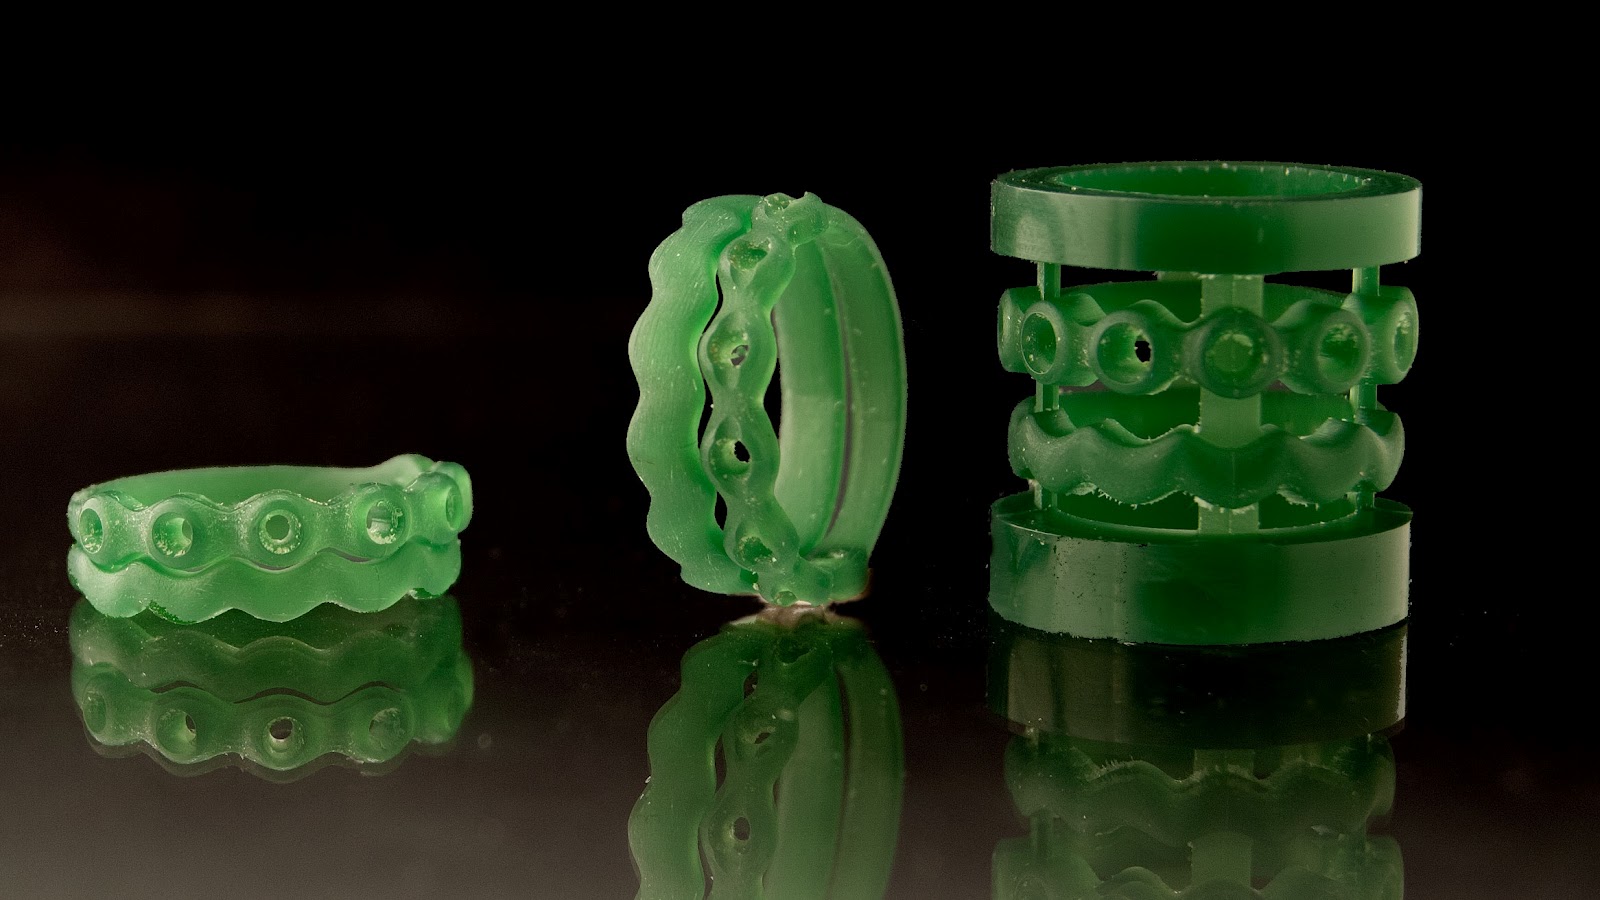
I stumbled onto metalsmithing by accident. When I was first married (without an engagement or wedding ring) I searched for a ring I liked enough to wear for the rest of my life. I saw some that were close but nothing quite right. In 2005 I found a jewelry class being offered at Santa Monica Community College (SMC) and thought I give it a spin as a means to learn more about the process. It was a great beginners class with lot's of hands on projects. I realized I really liked working with metal and making these tiny little things. Quite a surprise as I never was good at building models during architecture school. Those cardboard, plexy and wood stick buildings usually looked like a huge mess held together by globs of glue. Working with precious metals forces one to be really precise and accurate as not to waste those expensive materials. Plus it's quite nice to be able to just melt those things that did not turn out quite right and start all over until the skill was perfected. It took lot's of practice, trial and error to be able to make  jewelry I could be proud of. I took more Saturday classes at Loyola Marymount University which came with 24 hour access to a well equipped studio. Kind of heaven for the tool nerd in me. I had the chance to try out lots of techniques and really find the ones that felt right for me and my design sense. Wax carving and casting emerged as my preferred techiques to get the very 3 dimensional designs realized that where influenced by my architecture background. Rings proved to be my preferred designs which I treated as little 3 dimensional mini sculptures.

I loved those hours in the studio, working away quietly, getting dust and metal shavings all over me, my hands being sore and eyes tired after a full productive day. I dreamed about new designs at night and during my work hours in the office, hardly being able to wait until next Saturday to complete them. I was fascinated by the science aspect of metalsmithing. There is so much to learn about the physics of metals, chemical and optical aspects of gemstone minerals to be able to understand working with them and highlight them in the best way. It's a perfect marriage of design and science. I love the combination of using ancient techniques and 21st century technology. I finally can indulge in buying tools and using them day in and out. Working on my designs, carving wax, hammering on metal gets me in a happy and very relaxed mood. It helped me even through bad times of my marriage and the divorce as I could forget everything when I was in my studio. I found my true happy place in life.

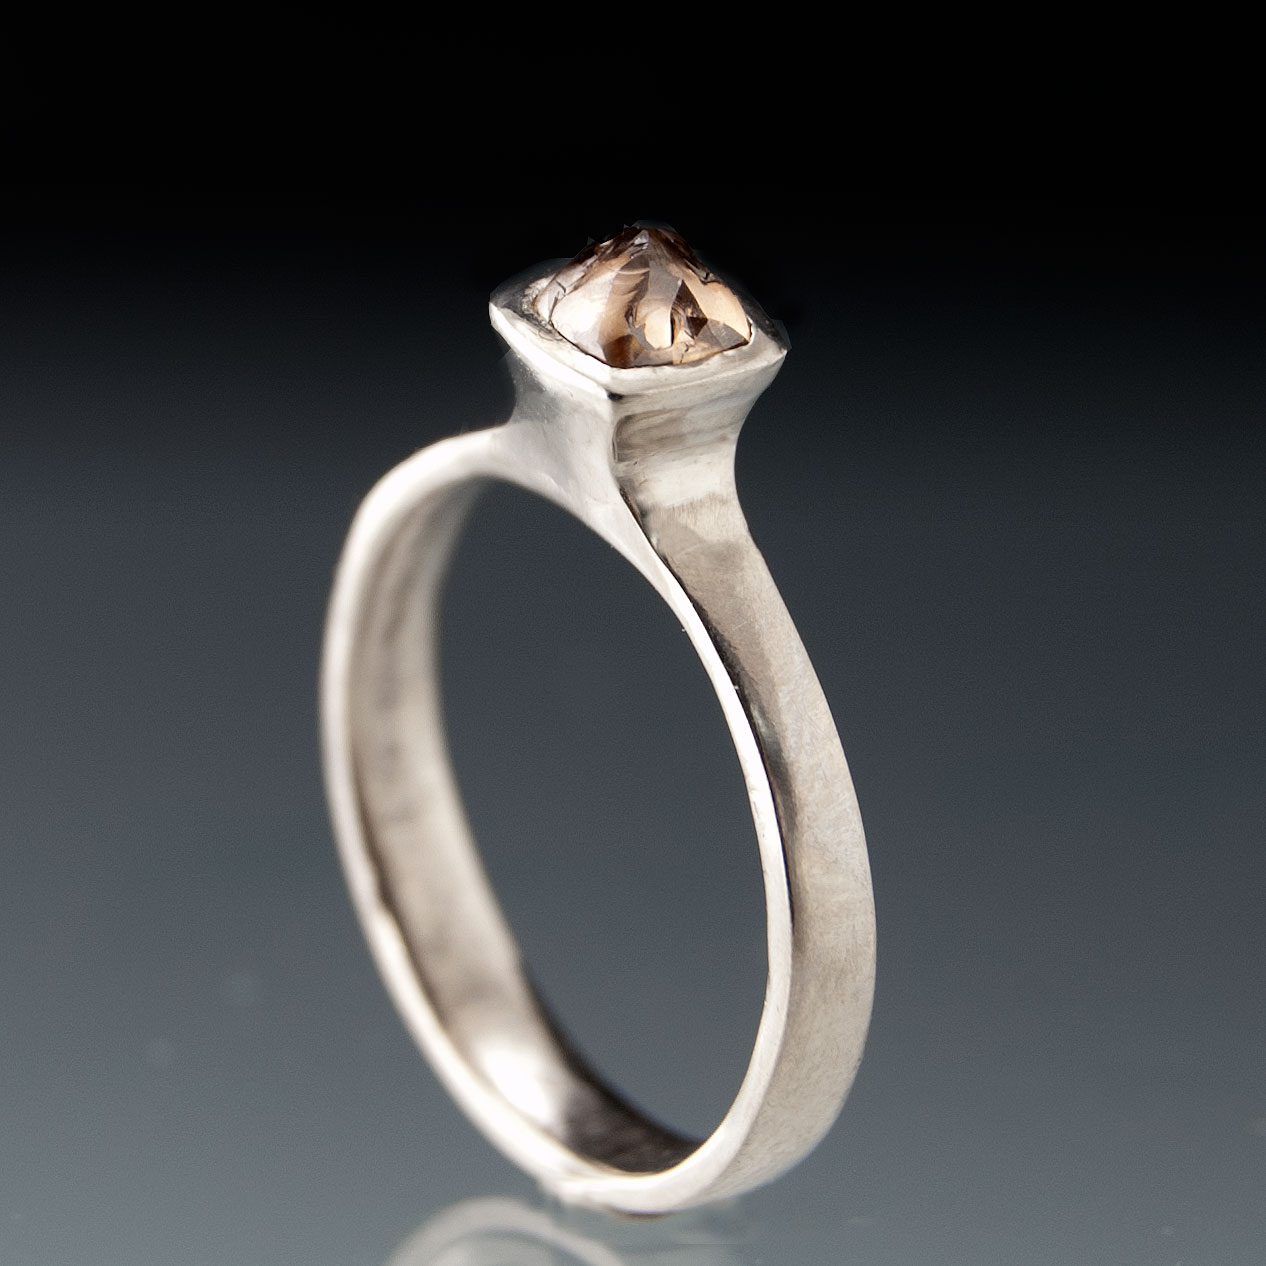
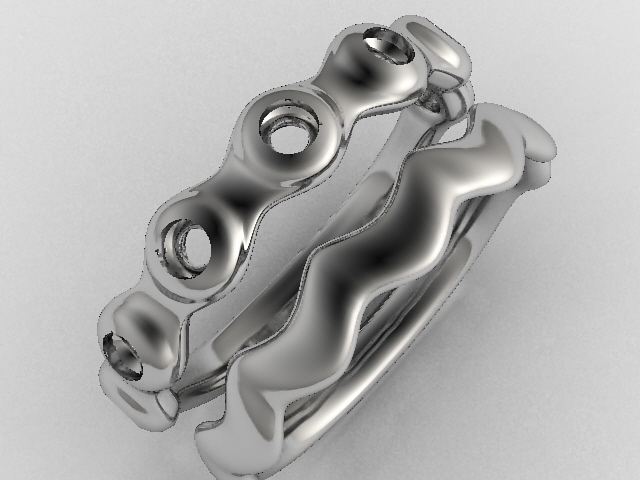
Ring I made for myself with a rough diamond I purchased years ago for my never to happen engagement ring

It took a couple years to perfect my skills enough to be able to sell my rings and learning the business site of online retail. Last year I realized I might have a shot at making this my full time adventure. I took a leave of absence for 6 month from my architecture job to give it a try and see if I can make a living with it. I also had to see if I would be bored or unhappy with metalmithing if it became a job and not just a hobby. After the 6 month came to an end things had developed better than expected. I was happy to officially quit my job and call myself self-employed. A year later I still don't miss my architecture job at all.

I just love being able to do what I love. There is so much more gratification in this type of work, more freedom to design and create. I am in charge of my own future. I love getting notes from my customers telling me how much the loved the rings I made for them. It's great to be able to do something that has so much meaning for others too and makes the designer and customer happy.

Feel free to check out why other Etsymetal Members choose jewelry making in their life:

Cynthia Del Giudice - http://CynthiaDelGiudice.blogspot.com
Laura Jane Bouton - http://laurajanebouton.blogspot.it/
silentgoddess: http://silentgoddess.blogspot.com
Beth Cyr: http://bcyrjewelry.blogspot.com
Peculiar Forest: http://peculiarforest.blogspot.com 
Tosca TerĂ¡n: http://www.nanopod.me
Mary Anne Karren: http://silverpearlmetalworks.wordpress.com/
My Precious Studio: http://mypreciousstudio.blogspot.com/
Deborah Lee Taylor: http://www.e5jewelryblog.com
Anne Walker: http://www.creativeinclinations.blogspot.com
Andrea Ring: http://www.amuckdesign.blogspot.com
Gracebourne Design: http://www.gracebourne.blogspot.com
Danielle Miller: http://daniellemillerjewelry.blogspot.com/
Evelyn Markasky: http://markasky.blogspot.com
Inbar Bareket: http://www.inbarbareket.info/blog
Jewellietta: http://www.jewellietta.blogspot.gr/
Abella Blue: http://www.abellablue.com/blog


Half Eternity Rings - from Design Idea to the Wax Models

| |
This is a description on how I can get from a idea in my head to having castable wax models in my hand by using new prototyping technology as opposed to carving directly in wax by hand. I still carve about 90% of all my design by hand. But some designs are just easier and more effective to do using CAD tools. It still takes considerable time to model and then prototype. It's definitely not as quick as some might think. It does not make sense to use it for one off designs but it's a great tool for designs using repetitive elements. It allows me to do more precise and detailed work than what I can do by hand carving. Eternity bands with repetitive settings around the entire ring are a great example for using CAD.

Real eternity bands are so tough to size with the pattern or settings needing to be equally distributed around the entire ring. It always ends up being a huge mess when people did not give me the correct size upfront and then need it resized. I usually end up making a totally new ring. This happened twice in the last 2 weeks with an order for one of my Wave rings. Now I am on the 3rd ring to make for that customer. Well, I am really learning how to make this ring in various sizes. :) The half eternity design one should solve that issue as the lower shank part can easily be cut and resized. Plus it also makes the stone setting go faster. Makes a huge difference in time and ultimately cost if there are 4, 8 or 16 stones to set in a ring. For this one I wanted to use 2mm round faceted stones for simplicity. So that is what I have in mind:

Rendering of ring design.

Let's start:
I modeled one rounded, kind of blobby looking, setting at the top. Lot's of pushing and pulling to create the shape. This works similar to clay modeling just in the digital world. That's why I love T-splines modelling software so much. It allows me to work with those digital tools pretty similar to how I carve my wax models by hand just using the mouse pointer and not carving tools.


round bubbly stone setting

After I had the main setting I used what works so great in CAD: the ability to copy things. I can use a radial symmetry function that allows me to array multiple settings around the center. With that only one setting get's modified until I am happy with it. All the copies, that were arrayed, get updated with those changes automatically. It's a huge time saver and I can do lots of modifications on the fly. I LOVE the symmetry function in T-Splines! The green lines in the model represent where the symmetry axises are. If all is to my liking, the copied settings just need to get bridged together to make one uniform connected model. 

Array of 4 bridged round setting
A lower shank was modeled and connected to the last setting on each side.A bit more pushing and pulling to get the final shape perfected.


I also thought to try adding a matching stacked band next to it. So I extracted the isocurve of one side of the ring and used it to create the band that would snuggle perfectly next to the stone set ring. The curve was extruded to create the ring width. The "TSthicken" function then created a volume out of the flat surface. 
Creating the matching stacked band.

 Lot's of "digital clay" pushing and pulling to give the band the final shape.


Final ring set.

 Quick renedering to check the design. 
Rendering of the rings without stones.

The models then get converted from T-Spline models into to Rhino Nurbs.

T-splines models converted into Rhino-nurbs.
This then gets converted into a mesh and exported into a STL file that can be read by a 3D printer or CNC milling software. The big advantage of working with T-splines is that the models are always watertight, fully closed without any open edges. When I previously was only working with Rhino and tried to create similar blended surfaces, I often encountered that the final models had tiny openings from blending operations. It made it impossible to print or mill them as the prototyping only works with completely "watertight" models. Since using T-Splines I never encounter that frustrating problem again and creating smooth blended transitions is so much easier now.

Mesh, ready for export.

Previously I would now send this STL file to a 3D printing service to either get a high resolution (and expensive around 80-100$ per ring) resin/wax model printed in 3 days or send it to Shapeways for a lower resolution print in their Ultra-detail plastic that cost around 6$ per ring. It takes a bit longer (about 2 weeks) and the prints have a bit of texture (which looks sometimes really nice if I am going for that textured look). The models can be cast directly but the burnout is not always totally clean. One can also make a silicone mold of the printed model and than create wax copies. The wait time and/or higher price for the high resolution models usually put a big stop on my creative flow when I wanted to come up with new designs.

Beginning of May I got a used CNC mill from Otto Frei. It's a Roland JWX-10 4th axis CNC mill that came with Protowizard software and ring fixtures.  The customer service at Otto Frei was great. They serviced the machine, calibrated all the fixtures and even provided support over the phone to get it setup and started. It's an expensive tool, even used, but so much fun. It opens up lots of new possibilities. Now I can go from idea to having wax models in my hand in the same day in just a couple hours and start casting afterwards immediately. It allows me to really try of lot's of options and evaluate them quicker. It will take a while to recoup the cost but I think it's worthwhile.

So with that new tool I transfer the STL file from my MAC book pro where I model (in Rhino4 for Windows via Parallels) to my old PC that is connected to the CNC mill.

Programmed milling path with supports and CNC mill on right.
There in the protowizard software I program the milling operations, set tools, supports and milling path. For this ring I chose to use the Tube Wizard as it allows me to mill both rings at the same time. It will only mill the outer surface of the ring, not the sides. But the detail on the sides it easy to do by hand after it's milled as it only required some rounding with some wax files and smoothing with sand paper. Milling never does undercuts like hollowing out the underside of a setting. Those things have to be done by hand carving the wax. Since I am used to carving it's not a problem for me. The milling waxes are the same as the carving waxes. They can easily get modified after milling to do adjustments needed for proper stone fit, hollow out and casting preparation.  Models with lot's of undercuts are better to be done by 3D printing. But those machines are a lot more expensive and the models are not as easy adjustable after they were printed.

The programmed path get then loaded into the mill software. The mill gets prepared by inserting the right milling tool bit, a wax rod is mounted on the rotary fixture and the zero point set to make sure the tool does only mill wax and does not accidentally run into the metal fixtures. Then it starts milling.  Here a video of the mill in operation :


A single milling in fine mode for these 2 rings takes about 50 minutes to complete.

More more complicated models that first get milled on each side with a flip fixture and then on the rotary axis this whole process can easily take 2 hours and requires tool changes in between.

Finished milled rings still attached to the wax rod via rectangle supports.
So from this point on all further work is done by hand just like I do all my other rings from the tool mark removal, to casting prep, metal casting itself and then all the clean-up work after the casting, polishing, stone setting etc. For this milled part the wax shavings need to get cleaned out and the rings cut off from the supports. The sides get filed to remove the support stubs. Then I size the inside with a wax reamer and adjusted any other things like smoothing the inside, hollowing out etc.


Finished wax models ready for casting prep.


I like it and went back to model software to play with a few design modifications like making the settings into a half bezel by cutting out a path. I also played with different width for the matching wedding band and created a set for slightly larger stones by scaling the settings. It's fairly easy to go back to the model in T-splines and make changes, then reconnect the parts and do the steps for the model export again and bring it into the milling software.


Stacked rings.


Variations of the same design by altering the settings in the CAD software and playing with different ring width.


So at the end of the day I had 3 rings sets that could be cast in the next few days.


Creative Sundays

| |
I love Sundays! They are there to relax and do different things than during the week. Since working full time on my own business I set a rule to not actually work on any orders on Sundays but use the time to do other things. Those can be going to the beach, visiting a museum, hanging out in the park, doing projects around the house or whatever else comes up. Then there is the Sunday's farmers market just a couple blocks from me and I often try to bike over there and get some fresh produce. I did manage to get way to much fruit and veggies again.
Pounds of fresh veggies and and fruits: squash, eggplants, spinach, carrots, cucumber, zucchinis, kale, tomatoes, peaches, plumbs, grapes, bread, plus some nice sunflowers.
I can never resist when I see all those beautiful colorful veggies. I also just got a juicer 2 days ago and wanted to try out some recipes I found. The juicing should make it easier to finish all that healthy stuff up pretty fast.

Perfectly eggshaped eggplants. One of my favorite and always comes home with me. 

Yummy herbs and greens en masses.

I also use Sundays to come up with creative new ideas. I know it's technically still working but somehow those relaxing Sunday mornings always get my creative mind unleashed. It's tough for me during the week to actually explore new design. Most days I am just trying to finish up as many rings as I can and keep the ball rolling on all these various stages all orders are in. I do get new ideas during the week but can't actually try them out due to time constrains. I sometimes manage to carve something up in wax when I am carving all my other ring orders. But for more elaborate designs, that I want to model in a 3D software, I need more uninterrupted time. So today I wanted to see how an idea for a ring design would actually look. 

I started modeling it in Rhino and T-splines while sipping on my coffee and munching on my Sunday eggs.  I had a half eternity ring in mind with the stone settings only on the top half around the band and a plain shank below to be able to size the ring. A couple hours later I had wax models done for a couple variations of that design:
CNC  milled wax models

How I got there I will show in a separate post as it will get pretty long with a step-by-step description.

I did stop in between go to the market and to give the doggies a nice long Sunday morning walk. They were pretty happy too.

On the right my 40lbs Jindo girl and left my 30lbs whatever mix (per DNA test he is a Bulldog-Chow-Australian Sheppard-Chihuaha and something else I can't remember-mix). Well, he is cute so who cares. Both are rescued dogs. I get stopped often and people ask if they are Dingos. I guess they look similar. Well, they would be a miniature version of those wild dog.
And I managed to do some gardening.  So overall it was a really nice Sunday and I am recharged for another busy week.


.

Etsymetal Blog Carnival: What In The World Are You Doing?"

| |


Well, not much going on here other than trying to get all my engagement ring orders out in time. Luckily June slowed down a bit to a more manageable work load and all the rings ordered in crazy April and May got done.  I don't have any summer vacation planned, but feel like I would really need it. A trip to Hawaii sounds lovely. Maybe later this year.

This weekend I finally took some time off to play with some new ideas.  I have ton's of beautiful colorful large gemstones that I don't use often anymore as I mostly do engagement rings these days. 

I have lots of rose cut tourmalines sitting around and really want to do something with these.

Small selection of rose cut Tourmalines in yummy bright colors
They would look amazing set in groupings of a few different colored stones. Maybe could also be stacking rings (which I rarely make). I could imaging these to be great set in gold bezels on a textured wide silver bracelet. I haven't done bracelets in a long time since silver stared to get so much pricier. I did play all weekend with ideas but haven't had a breakthrough yet of what I really want to with these.  

But it lead to to a few other ideas. I am planning to retire my Mermaid ring collection. It's one of my oldest ring designs and I am a bit tired of making these rings. The Aquarius ring with the Aquamarine cabochon and the Garnet version still sell well on Artful Home. But I think it's time to move on. I do have to find some new designs for all the cabochons I still have. I did play around with some ideas and sketched them out in Rhino3D and then milled some master models on my new CNC machine.  I think they can still get a bit wider and maybe get combined with some gold bezels for some deep colored stones, different textures of the ring top, gold accents and maybe some small flush set faceted stones.

Milled Wax Model with 14x10mm Aquamarine cabochon.
I got these large Tourmalines a while ago and thing they would definitely look great set in a 18k gold bezel on a textured and oxidized ring.
I also tried to come up with something for some Tanzanites I have. First try (which needs improvement) with a oval Tanzanite set in a bezel and small flush set sapphires or Tanzanites set around. Sketched again in Rhino3D first to try out a few versions and then milled a wax model.

Quick Computer rendering of ring with faceted Tanzanites.


Milled wax model with oval light blue Tanzanite and some small faceted Tanzanites that could complement it

 I think one of the next weekends I will try to figure something out for some of those crazy big actinolite quartes I have. I have some huge sculptural designs developing in my head and really want to see how they would come out in a 1:1 scale model. They will be more sculptures than actual normal rings but still kind of wearable for the special occasion.


I really enjoy being able to sketch out a few ideas by either computer modeling or just carving some wax models. It's definitely a cheaper way to try out a few options without having to invest in the precious metal. I never really sketch on paper and usually don't really have a clear idea in mind. It all develops once I start manipulating either the digital model or the wax carvings. It's still pretty time intensive but since I don't have a deadline for these, it's a nice and somewhat relaxing way to spend a weekend.

This post is part of the Etsymetal Blog Carnival. To see what other Etsy Metal members have written, click on the links below to visit their blogs.
1. Laney - http://silentgoddess.blogspot.com
2. Evelyn - http://markasky.blogspot.com/
3. victoria takahashi - http://vtakahashi.blogspot.com/
4. Miranda - http://gracebourne.blogspot.ca/
5. Beth Cyr - http://bcyrjewelry.blogspot.com
6. Rebecca Bogan - http://AdobeSol.wordpress.com
7. Anne Walker - http://www.creativeinclinations.blogspot.com
8. Erin Austin - http://metalmusing.blogspot.com/
9. Danielle Miller - http://daniellemillerjewelry.blogspot.com/

Related Posts with Thumbnails